New Installation
New Installation
2024-10-03
Version 2.0
Eagle Eye Networks systems are set up as DHCP by default which makes installation a breeze. If the customer requires the system to be set up statically it is easy to make that change as well. Here is a standard walkthrough of the installation and account setup processes.
Installation
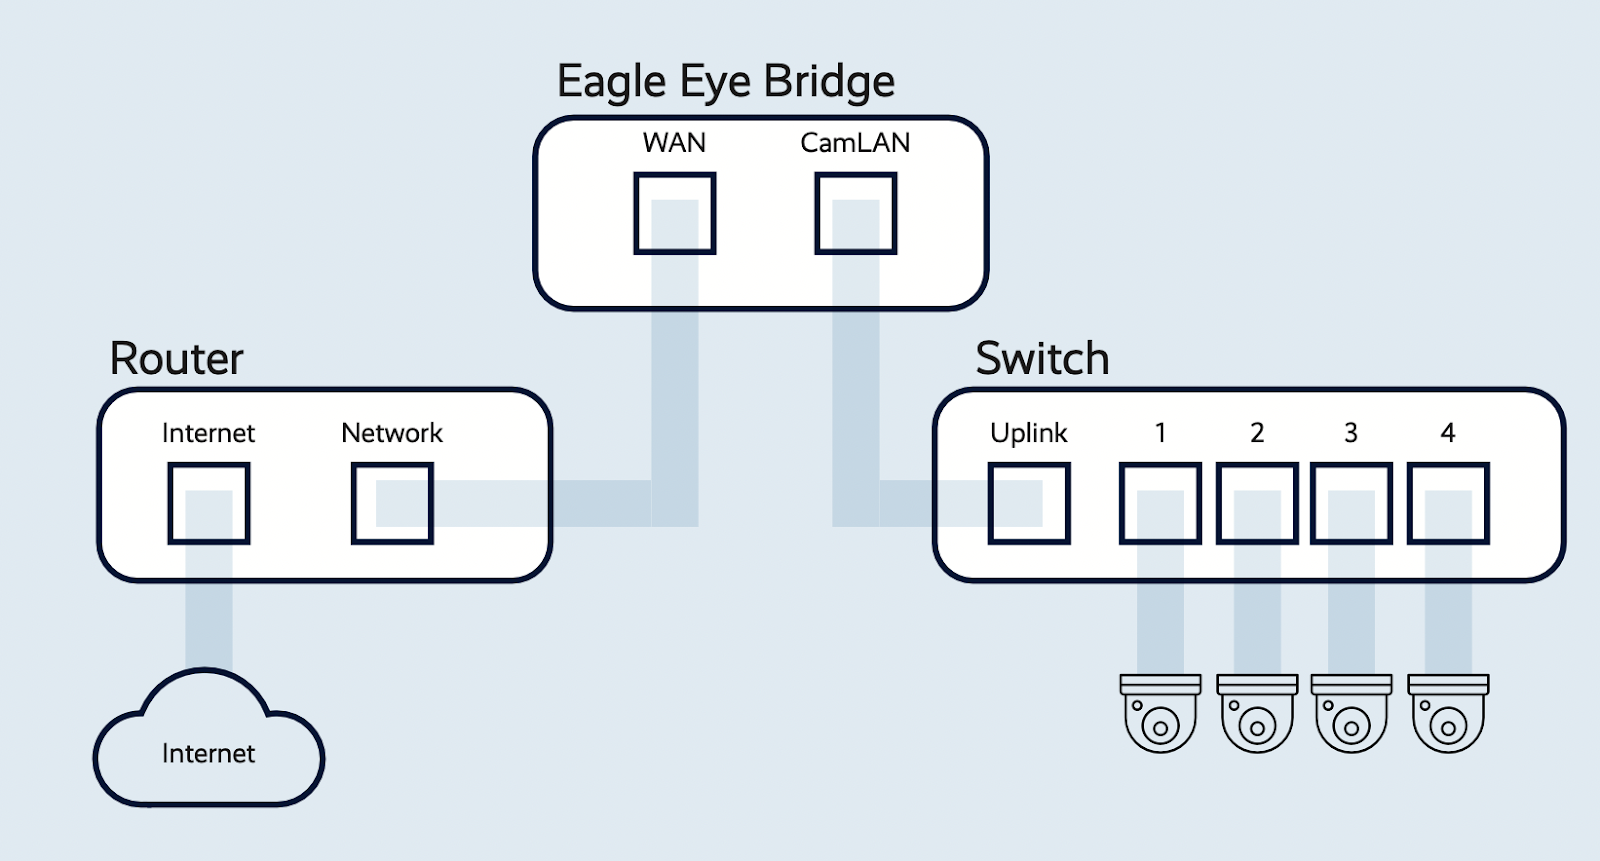
Connect the equipment according to the image above. If the system will be utilizing third party devices there will need to be some adjustments made.

The Switch
IGMP Snooping is disabled.
Multicast is enabled.
If the system is utilizing multiple switches they can be connected in different ways:
Star - One switch connected to the CamLAN, other switches plugged into the main switch (recommended)
Daisy Chain - CamLAN>G1>G2>G1>G2>G1 (not recommended)
The Network
The local IT for the business must ensure all the ports on our Firewall Guide are open, not filtered, to ensure the system is able to communicate fully.
If the cameras are on the local network rather than the CamLAN ensure that all the cameras are on the same IP scheme as the bridge.
Once physical installation is complete, the devices will need to be added to the Eagle Eye Networks Cloud VMS account. If the account does not exist, it will need to be created first.
Log in to your Eagle Eye Networks Cloud VMS account.
Click the Ellipsis icon.

The Attach ID is a 16 character code of letters and numbers found on a paper attached to the Bridge. It is not case sensitive and does not require dashes.
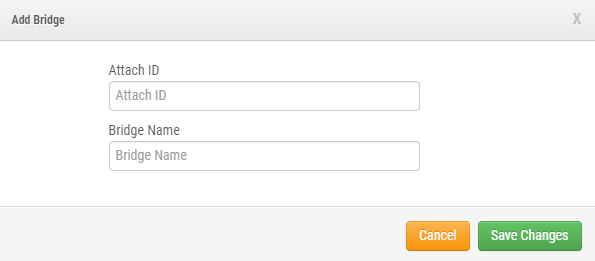
Name the Bridge what is necessary.
Click Save Changes.
The Bridge will populate on the Dashboard within a couple minutes.

Alternatively, you can find the Attach ID within the unit via a monitor and keyboard connection.
Log in with the default credentials username: admin password: Last 5 (or 6) integers of the bridge serial number. The Attach ID will be located on the initial login screen.
Once the Bridge is added it will detect any cameras on the same network, that have ONVIF enabled. Some units have ports for cameras but most systems will require an external Switch. Ensure the Switch is plugged into the port labeled CamLan on the bridge.
The Cameras will populate in Available Cameras at the bottom of the Dashboard.
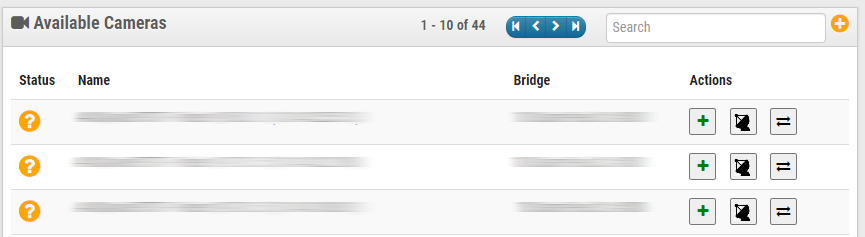
Click the Green Plus icon next to each camera to add it to the account.
The camera username and password is necessary for the system to log in to the camera, however for non Eagle Eye cameras this field’s requirements will be for the ONVIF login information. If the camera has a section to create an ONVIF profile this must be done or the bridge will not be able to discover the device.
The Eagle Eye Dashboard does not support special characters (i.e. !,#,$) however if the camera requires one use the hyphen “-” or underscore “_”.

Here are a couple configuration guides for common brands that we support:

For support please email: support@een.com
or give us a call at: 512-473-0501
US: +1-512-473-0501
EU: 31 (0) 20 26 10 461
ASIA PACIFIC: +81-(3)-6869-5477
#1 In Cloud Media Video Surveillance Worldwide
Copyright Eagle Eye Networks. All rights reserved.
Related Articles
Reseller Starter Guide
Reseller Starter Guide 2024-05-09 Version 2.0 Description Welcome to Eagle Eye Networks, the number one in cloud-based video surveillance worldwide. Here are a few tips and guides to help you get started. SubAccounts From your Reseller Dashboard, you ...Bridge Swap
Bridge Swap 2025-14-01 Version 2.3 Description The bridge swap process allows you to replace your offline bridge with a new unit without losing your camera recordings. The process consists of three steps: Add the new bridge to the account. Click the ...Bridge and Camera Swaps In Enhanced
Classic Vs Enhanced Interface Currently, Eagle Eye offers two different versions of our VMS (Video Management System): the Classic and Enhanced Web Interfaces. The Classic Interface is our legacy UI, while the Enhanced Interface is our newer ...Mobile Bridge Configurator FAQ
Mobile Bridge Configurator FAQ 2024-05-22 Version 2.0 Description The Eagle Eye Mobile Bridge Configurator aims to facilitate the configuration of a bridge without the need for a keyboard or monitor. Using this application you can configure bridges, ...Enhanced Interface Reseller Guide
Enhanced Interface Reseller Guide 2026-02-19 Classic Vs Enhanced Interface Currently, Eagle Eye offers two different versions of our VMS (Video Management System): the Classic and Enhanced Web Interfaces. The Classic Interface is our legacy UI, while ...