Cloud VMS FAQ
Cloud VMS FAQ
2024-05-28
Version 2.0
How do I add a bridge?
How do I add a camera?
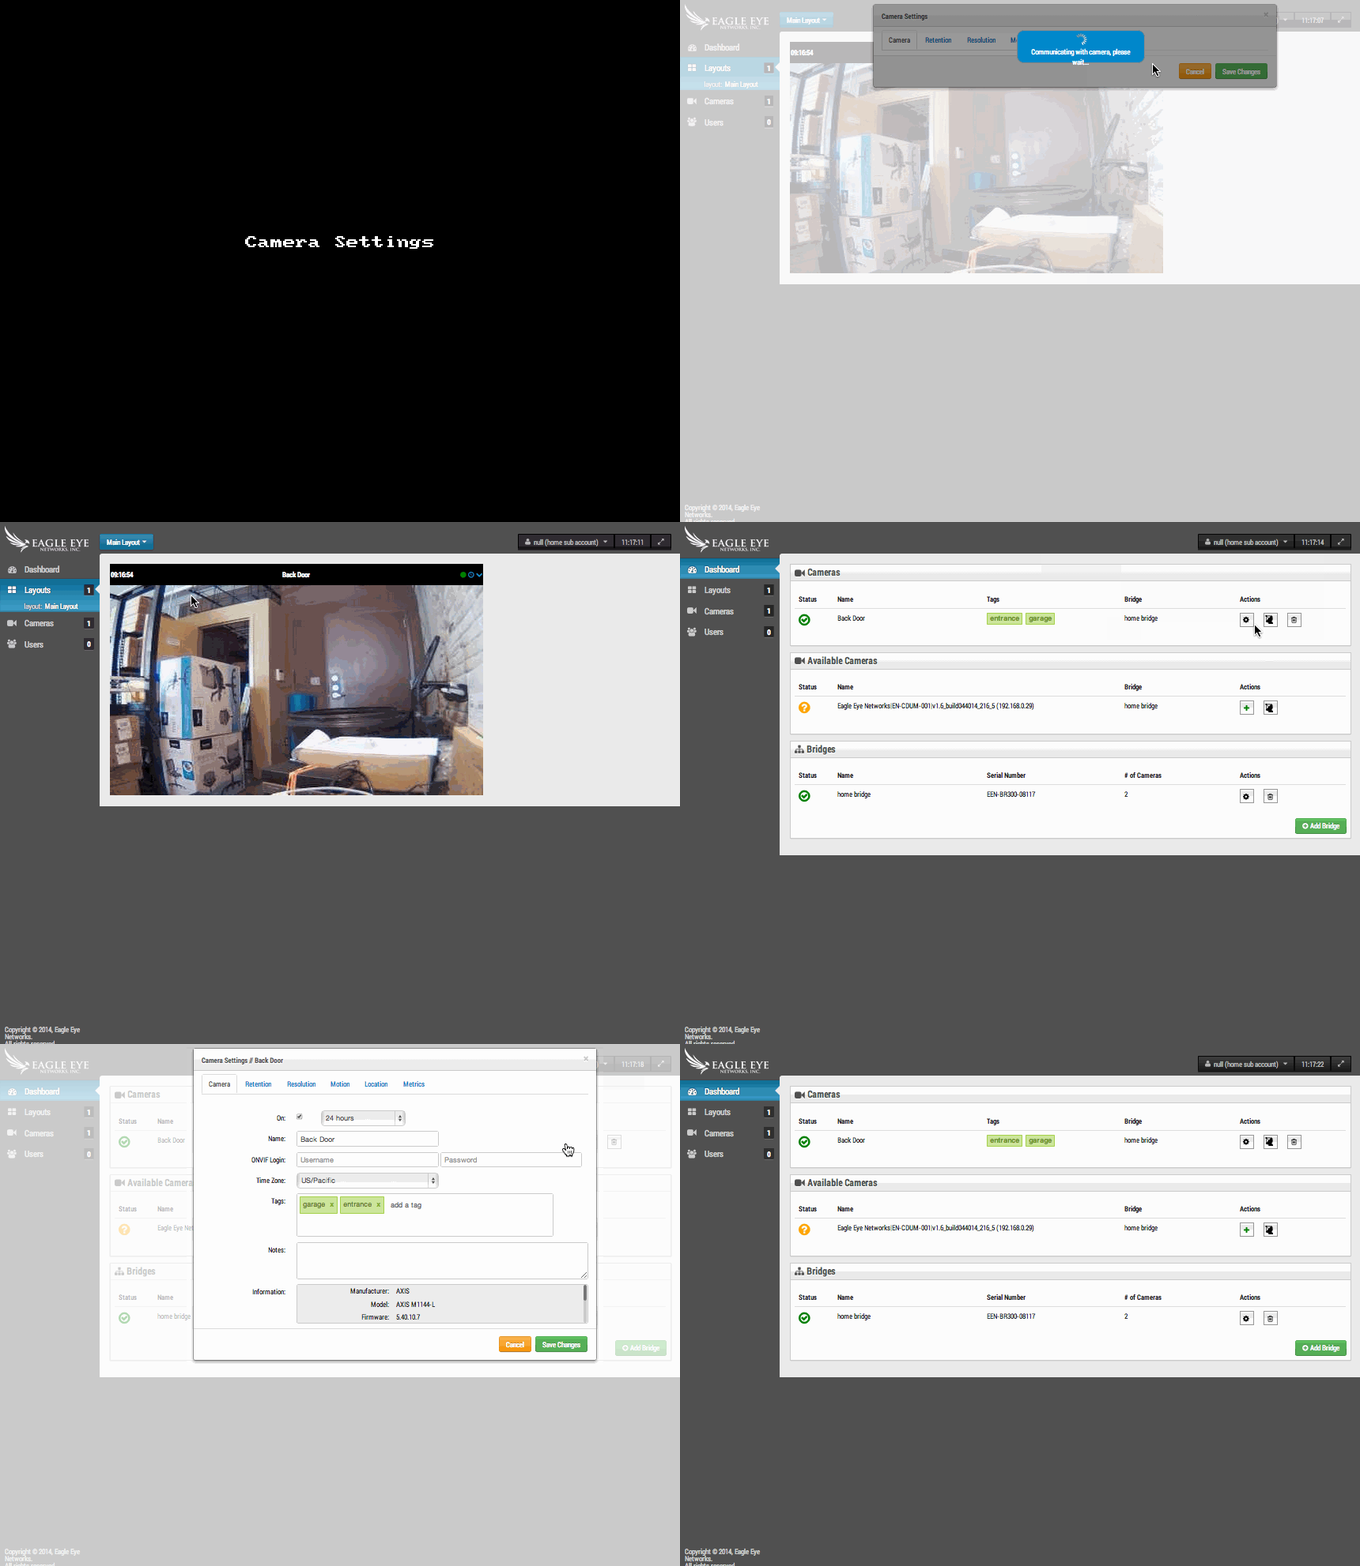
Each bridge scans the local network looking for ONVIF cameras. Cameras that can be added will show up in the “Available Cameras” section of the dashboard. You can click the green plus icon and the camera will be added to your account. The bridge will negotiate a connection and display previews once the camera is streaming. You can then go straight to camera settings.


How do I get to camera settings?
You can access camera settings from the Dashboard using the gear icon, or using the drop-down menu on the camera’s preview video.
How do I change camera resolution?
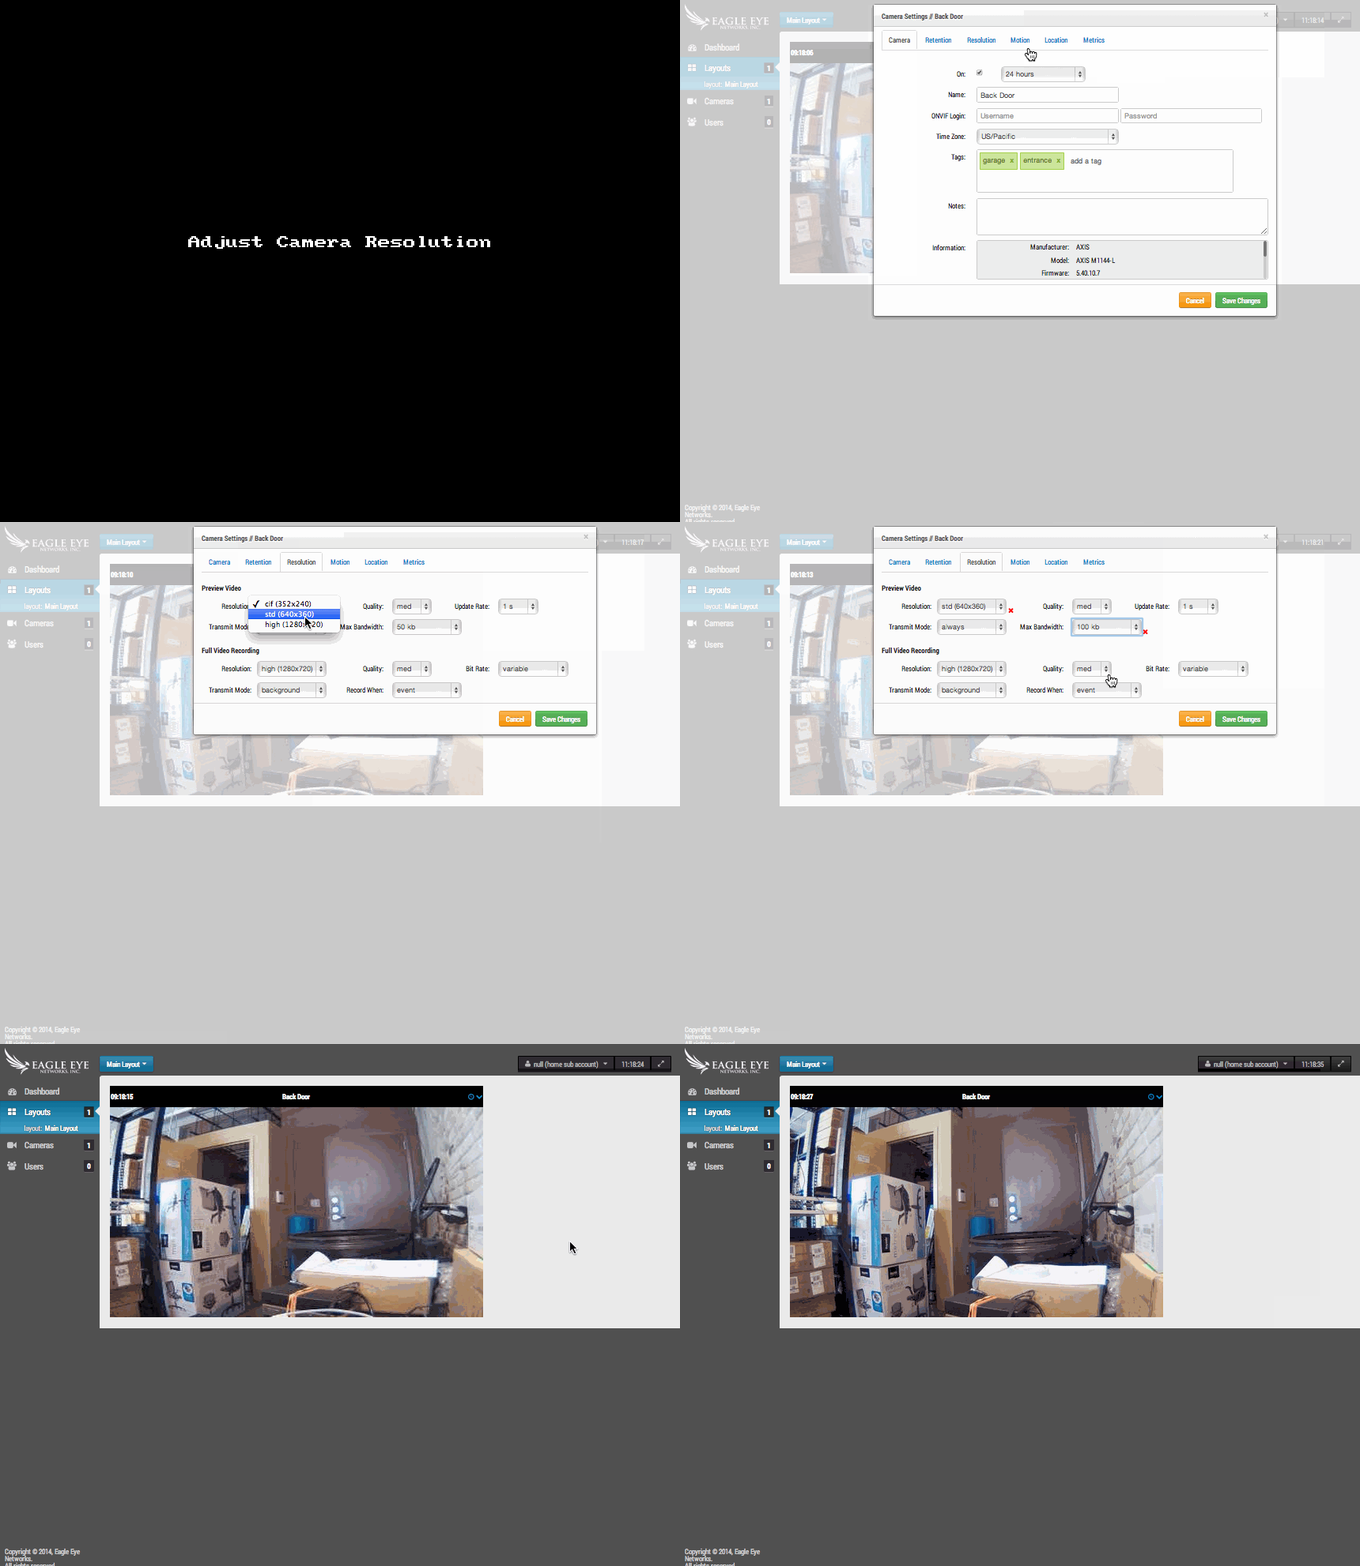
The third tab in the camera settings is for Resolution. There you can change settings for the preview stream and full video stream. The preview stream is a low resolution image updated once a second. The full video settings are for live streaming and historic videos.
How do I view cameras?
After adding a camera, it will be available under cameras on the left side. Tags given to cameras show up in this camera section. Tag based layouts are similar to regular layouts but do not allow customization.

How do I create a layout?
Click on Layouts on the left side. You can create a new layout with the button in the lower right corner. Once you create it you will be able to customize it using the layout menu in the upper left.

How do I resize a layout?
You can resize and rearrange cameras inside of a layout by choosing Edit from the layout menu in the upper left.


For support please email: support@een.com
or give us a call at: 512-473-0501
US: +1-512-473-0501
EU: 31 (0) 20 26 10 461
ASIA PACIFIC: +81-(3)-6869-5477
#1 In Cloud Media Video Surveillance Worldwide
Related Articles
Camera Direct FAQ
Camera Direct FAQ 2025-01-23 Version 2.1 Overview Eagle Eye Camera Direct is a simple solution that provides system flexibility and is ideal for businesses with multiple locations requiring only a few cameras at each location. Deploy Camera Direct ...New Installation
New Installation 2024-10-03 Version 2.0 Description Eagle Eye Networks systems are set up as DHCP by default which makes installation a breeze. If the customer requires the system to be set up statically it is easy to make that change as well. Here ...Analytics FAQ
Analytics FAQ 2024-06-01 Version 2.0 Questions & Answers Will I be able to enable any analytics I want free-of-charge? Depending on your account edition, some analytics may still charge. Analytics such as Object Counting are only included in ...Recommended Camera Settings
Recommended Camera Settings 2024-05-14 Version 2.0 Description When integrating a third party camera with your Eagle Eye system it is necessary to preconfigure the device to ensure optimal operation. ONVIF Protocol If the camera supports ONVIF ensure ...EE AN029 Adjusting Camera Settings Through Camera Tunnels
Eagle Eye Application Note – AN0029 Adjusting Camera Settings Through Camera Tunnels Adjusting Camera Settings Through Camera Tunnels Click the banner to view the full Application Note. This Application Note is intended for administrators of the ...