Adding a Camera Password to the Password Locker
Adding a Camera Password to the Password Locker
2026-10-12
Version 3.0
Some third-party IP cameras require a separate set of credentials to be created for ONVIF validation. When creating the profile, it is recommended to use the same login credentials as the camera itself.
This guide will demonstrate how you can resolve the red padlock icon that may show up to the left of the Available Camera by storing these credentials in the account.
1. Open up the sidebar to the left by clicking on the arrow.

2. Click Admin.
3. Then click on Account Settings.
3. Then click on Account Settings.
4. Click Camera.
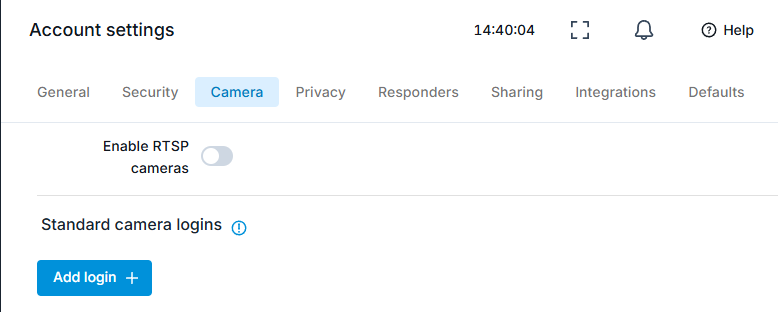
5. Click Add Login.
6. Input Camera Credentials.
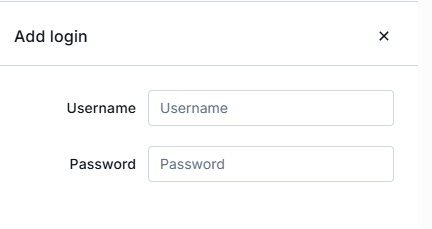
7. Click Save Changes.

Since the password locker will now use these credentials to authorize all cameras on the sub-account, it is imperative to disable Illegal Login Lock if the setting exists within a camera. If it is not disabled, the system will lock itself out of the camera.
It will take a few (5-10) minutes for the bridge to communicate the password to the camera. Once the credentials validate, the camera will stream as normal.
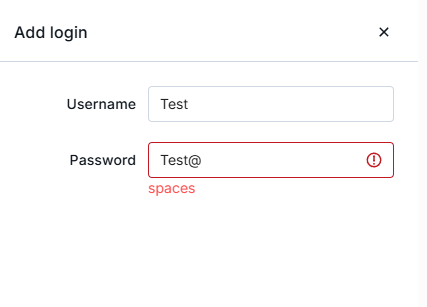
There are some characters, when it comes to creating a username and password, that we won't accept in the Password Locker such as @, /, \ or Spaces:
There are some characters, when it comes to creating a username and password, that we won't accept in the Password Locker such as @, /, \ or Spaces: