Hikvision Camera Configuration Guide
Hikvision Camera Configuration Guide
Hikvision's SADP Tool and Camera Activation


Configuration of Individual Cameras
To integrate a Hikvision camera there are a few settings that need adjustment. Please follow the steps below to configure the device so that it integrates properly with the Eagle Eye system.
Disable Illegal Login Lock
Log in to the Hikvision Camera.
Under System select Security.
Under Security select Security Service.
Uncheck the “Enable Illegal Login Lock” field.
Save.

Set up an ONVIF profile
Log in to the Hikvision Camera.
Under Network select Advanced Settings.
Under Advanced Settings select Integration Protocol.
Check the “Enable Hikvision-CGI” field.

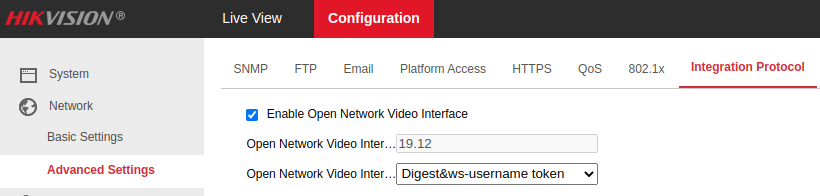
Add a User using the same login information as the camera at Admin level.
Save.

Log in to the Hikvision Camera.
Under the Image tab select OSD Settings.
Uncheck “Display Date”.
Save.

The OSD can cause motion events in the Eagle Eye system triggering constant recording.
Under System select System Settings.
Under System Settings select Time Settings.
Ensure the Time Zone is correct.
Save.
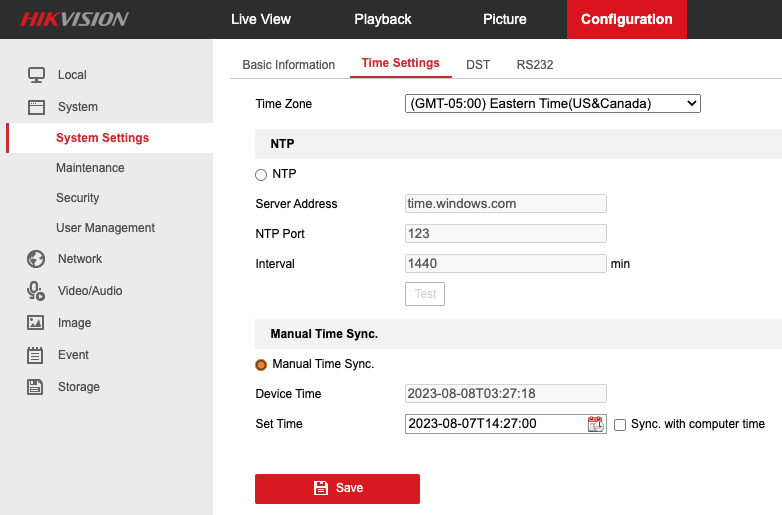
If there are any issues selecting the Time Zone attempt to sync it with computer time.
Main and Sub Stream Configuration
MainStream
Under Video/Audio select Video.
Select Stream Type “Main Steam(Normal)”.
Select the Resolution necessary.
Select 12fps for the Frame Rate.
Select H.264 for Video Encoding.
Ensure H.264+ is OFF.
Save.

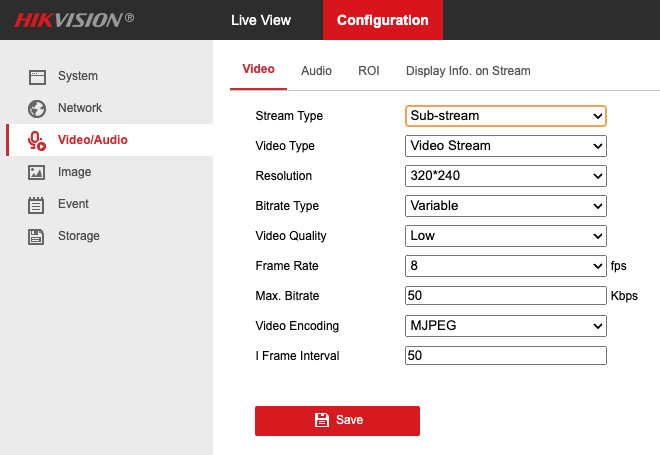
SubStream
Under Video/ Audio select Video.
Select Stream type “Sub-stream”.
Select the Resolution necessary.
Select 8fps for the Frame Rate.
Select MJPEG for Video Encoding.
Save.

For support please email: support@een.com
or give us a call at: 512-473-0501
US: +1-512-473-0501
EU: 31 (0) 20 26 10 460
ASIA PACIFIC: +81-(3)-6869-5477
#1 In Cloud Media Video Surveillance Worldwide
Copyright Eagle Eye Networks. All rights reserved.

For support please email: support@een.com
or give us a call at: 512-473-0501
US: +1-512-473-0501
EU: 31 (0) 20 26 10 460
ASIA PACIFIC: +81-(3)-6869-5477
#1 In Cloud Media Video Surveillance Worldwide
Copyright Eagle Eye Networks. All rights reserved.
Related Articles
Hikvision DVR/Encoder Configuration Guide
Hikvision DVR/Encoder Configuration Guide Requirements: A Windows computer with the ability to be set statically Internet Explorer An Ethernet cable A supported Hikvision Encoder/DVR Check here to check if your Hikvision DVR/Encoder is supported. In ...Amcrest Camera Configuration Guide
Amcrest Camera Configuration Guide The guide provides detailed steps on the configuration of Amcrest cameras for use with an Eagle Eye bridge/CMVR. Step 1: VPN or log directly into the Amcrest camera. Click the button next to the camera in Available ...Mobotix/ MOVE Camera Configuration Guide
Mobotix/ MOVE Camera Configuration Guide To ensure your Mobotix camera integrates with the Eagle Eye System properly, the following configuration specifications need to be met. Configuration After logging in to the camera, navigate to the Admin Menu ...Axis Camera Configuration Guide
Axis Camera Configuration Guide Most Axis camera’s default settings are compatible with our system. The main functionality that needs to be set up for the camera to stream is ONVIF. Please follow these steps to enable the functionality. ONVIF Setup ...2N Axis Camera Configuration
2N Axis Camera Configuration Guide This guide will show you how to properly configure 2N Axis cameras to integrate properly with you Eagle Eye system. Models currently supported by Eagle Eye Networks: 2N Axis Base 2N Axis Solo 2N Axis Style 2N Axis ...